Sunday, May 29, 2011

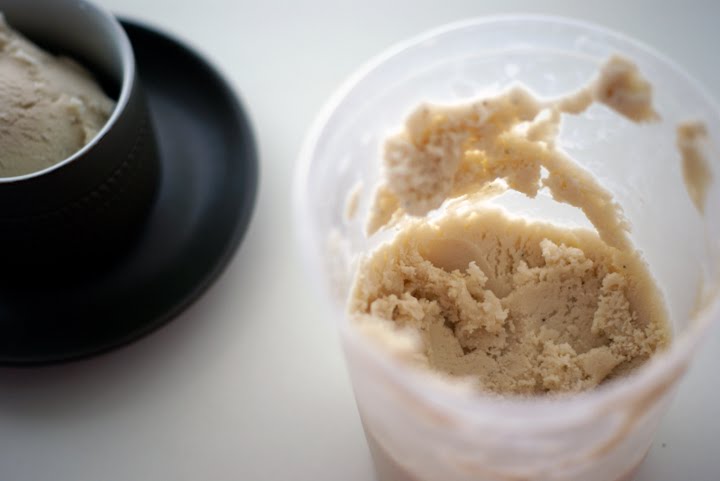
Matcha Green Tea Cream Pops


Another fantastically easy/lazy-times recipe to follow:

Matcha green tea frozen cream bars! Last summer I spent a long time googling the heck out of ice cream bar molds. There are crazy expensive ones out there, and at the same time there are excellent D.I.Y. ways to make em: how about pouring your treat recipe into shot glasses, freezing them for 15 minutes then jamming a wooden stick in there, then letting them set til ready? Orangette has a lovely tutorial on it.

Or, do what I did ... on a trip to DAISO, which is one of Richmond's excellent dollar-store-esque emporiums,I found the cutest little 4-pop popsicle molds for $2/each. Problem solved! Now, what to put in them??

I combined 3 cups of cream (33%), 1/2 cup of sweetened condensed milk (my favourite ice cream "creamifier" and sweetener), a pinch of salt, and 2 heaping teaspoons of matcha green tea powder in a medium sized pot on the stovetop, whisking over medium high heat until everything blended together. I then poured the mixture through a fine mesh strainer to strain out any gunk, cooled it for 20 minutes in the freezer, then poured directly into my ice pop molds.

You will want these to freeze overnight for maximum popsicle-ness! I was trying to make these less-sweet than usual, but you can feel free to play around with the condensed milk amount.

Enjoy being lazy in putting together this simple but deliciously creamy and green tea-ey cream pop! Ahhh, the magic of frozen stuff!

Next up for ice cream pops: fresh raspberry frozen yogurt pops! Stay tuned! ^__^

Saturday, May 7, 2011

Strawberry Sour Cream Ice Cream & Cake!

Strawberry ice cream... Summery, right? Today was not so summery in Vancouver - pouring torrential rain mixed with hard cold granules of hail... all day! And the teensiest sun break in the clouds around dusk.

Oh man, I cannot wait until it's berry picking season here in British Columbia. Navigating prickly bushes on hot sunny days, plucking shiny blackberries from branches and filling buckets for freshly baked pies and general snacking. Whee, so fun!

This recipe is super simple, and it's taken from David Leibovitz's The Perfect Scoop. It's an interesting little texture straight out of the ice cream maker - super fluffy and airy, almost a mousse-like consistency, not hard like your typical scoop ice cream. You'll need to freeze it for a good 24 hours to solidify it. I used a pound of organic strawberries (I know they are more costly... but they taste sooo much better, amazingly sweet and complex and sour ... unlike their sometimes flavourless nonorganic brothers). The recipe calls for a technique called "macerating" your strawberries - sounds dangerous, right? Not at all! You just slice up those strawberries and mix them all up with your sugar and a teensy blast of vodka, and let sit for 1 hour. This little process helps to bring out the juiciness and sweetness in your berries. Fun, right?

And you get to use vodka.. so if you really wanted, you could take this opportunity to pour yourself a little icy delightful cocktail! I just love a cocktail that's cold and in a lovely glass. Glassware is so important to the enjoyment of my beverage.


Back to the ice cream... sweet, rich, creamy and tangy with that beautiful hue of soft strawberry pink.


{Strawberry Sour Cream Ice Cream}

You will need:

1 pound of strawberries (fresh, frozen, organic or non!)
3/4 cups of sugar
1 tablespoon of vodka
1 cup of sour cream
1 cup of heavy cream (whipping cream - 33% milk fat)
1/2 teaspoon freshly squeezed lemon juice


to make the ice cream:


1. Slice the strawberries and place in a medium sized bowl with the sugar and vodka. Gently toss to combine. Cover and let sit at room temperature for 1 hour.
2. Place strawberry mixture in a blender with the sour cream, heavy cream and lemon juice. Pulse to blend so some small strawberry chunks remain.
3. Pour into medium sized bowl and power-chill in freezer for 30 minutes, or chill in refrigerator until nice and cold (1-2 hours).
4. Pour into ice cream maker and mix according to ice cream maker instructions, I churned this recipe for about 25 minutes. Freeze this overnight to get it to a hard-scoop consistency. To keep the mousse-like airiness, eat right away!
5. Enjoy your ice cream and marvel at how freaking easy that was! You feel like a genius!!


and now... the CAKE!


So the real purpose of me making this strawberry ice cream was to use it as a filling for a Mother's Day cake!

I made an 8 inch round vanilla cake, added a little pink food colouring and baked it. Then I was confused. I had never made a layer cakey thing with ice cream as a filling - how do I build it? Do I freeze everything? Do I build it last minute?? I ended up freezing the cake, and still building it last minute. So next time for the ease of cutting the cake (it was ROCK HARD and very hard to cut into, even after 15 minutes of being out! Holy!) I will build it right before serving it!

So here are the layers:

Bottom: pink vanilla cake, with strawberry preserves spread on top.
Middle: ice cream, poured into an 8 inch spring-release pan and frozen overnight to stay extra-set.
Top: pink vanilla cake, with more strawberry preserves.
Very top: fresh whipping cream and fresh sliced organic strawberries.
Extra very top: A little cake bunting I made using Japanese washi tape (colored masking tape) and wooden skewers, in matching pink and grey cuteness! My grandma said it looked like laundry hanging out to dry!

I loved how this cake turned out visually... so cute!

Bye for now Ice Cream Land!

xo Lyndsay

Monday, April 4, 2011

Milky Chocolate Ice Cream Pie


I made this pie for my mother-in-law's birthday... I think I may be the luckiest gal to have the best mother-in-law ever.

I tried to low-fat this ice cream pie up a bit by using 10% milk fat milk instead of my usual heavy cream, in both the ice cream part and the fudge topping part. Though the fudge topping didn't turn out as rich and didn't hold together as well as the previous times I've made this, apart from the looks of it the result was, yes, still delicious! The ice cream filling was a tad more on the ice-milky side but still creamy and rich from the use of my favourite ice cream addition, sweetened condensed milk. The only bummer thing is that I threw this pie together too quickly after a day of shopping... and it didn't have time to properly set before serving. So I would say definitely chill this pie overnight before serving for maximum pie-shape. If you don't mind digging into a melty sundae-like icescreamsplosion, then feel free to chill for only 2 hours in the freezer! (which is what happened to me!)

If I made this again I would definitely make the fudge topping original style (ie with heavy cream vs. the lower fat milk), keep the ice cream component the same, and chill this overnight.

But... all you need to do now is sit back and relax and let your fingers do the simple work, as this is another easy-as-pie (heh) ice cream recipe!


{Milky Chocolate Ice Cream Pie}

You will need:

- An Oreo or chocolate wafer cookie pie crust

- Milk chocolate ice cream

- Dark cocoa chocolate fudge topping

(recipes below!)


to make the crust:

Combine 1 1/4 cups Oreo or dark wafer cookie crumbs with 1/4 cup melted butter. Press into 9 inch pie pan. Bake at 350 degrees for 6-8 minutes until set. Let cool on wire rack.

to make the ice cream:

1. In a medium sized pot on low heat, whisk to combine 3 cups of 10% milk, 1/2 cup of Dutch-process cocoa powder (I used 20-40% cocoa content), a teensy pinch of salt and 1 can of sweetened condensed milk (300 ml). Heat until all components are combined.
2. Power-chill mixture in the freezer for 1 hour+until mixture is ice cold but not frozen. Open the freezer occasionally to make sure it hasn't frozen!
4. Pour into ice cream maker and mix according to ice cream maker instructions, I churned this recipe for about 25 minutes.
5. Scoop ice cream into cooled pie shell, using an offset spatula to smooth it. Put in freezer, uncovered while you make the fudge sauce.

to make the fudge sauce:

On stovetop, combine 1/3 cup of dark or high quality cocoa powder with 2/3 cup sugar, 1/3 cup of heavy cream (though I used 10% milk this time, but feel free to try either!) and 3 tablespoons of butter. Whisk gently to combine. Add 1 teaspoon of pure vanilla extract, whisk until smooth. Pour into bowl to cool. I power-chilled my fudge sauce in the freezer for 20 minutes!

Once fudge sauce is cooled, pour on top of milk chocolate ice cream layer. It's important that the fudge sauce is cooled otherwise it will melty-melt the ice cream and it won't look very pretty.

Place back in freezer and chill for 1 hour uncovered until fudge sauce is set. Then wrap with plastic wrap and chill preferably overnight until time to serve!!


Note: You can also just forgo the pie part and make the ice cream on its own... so fast, easy and VERY DELICIOUS! ^__^

Enjoy!!! xo

Tuesday, February 1, 2011

Greatest Korean Alive Ice Cream & Cake


My good pal and cousin from another Asian mother Christa Min had her birthday this past week. So I sneaky-deakily (out of sheer love for the greatest Korean alive) created a super mini surprise party for Christa and all of her tight buds, with a surprise musical performance by the super excellent and undercover Joel R L Phelps.

We had a pizza party for four, which then expanded after a knock at the front door to ten guests... earlier I had made a dark chocolate cake with mocha buttercream, and to match, a lightly coffee-flavoured ice cream!

I think I am getting lazy in my ice cream making! All I did was brew 1 strong cup of dark French roast coffee, dumped in some 10% milk, sprinkled a dash of the ground espresso into it, a quick grind of my sea salt mill and mixed in a can of thick sweetened condensed milk. I whisked this all together, powerchilled it in the freezer for 1 hour and then poured straight into my ice cream maker!

It was a little more ice-milky than ice-creamy, so if you want a full creamy ice cream, I would follow the recipe I posted previously on Vietnamese condensed milk coffee ice cream. But if you want a lighter touch to go alongside a delightful rich cake, go light! Go frozen yogurt even! I want to try a coffee frozen yogurt next.

and Happy Birthday cousin C-Min!! xo

Sunday, January 9, 2011

Nog Nog, Who's There? Egg Nog Ice Cream


Don't nog it 'til you've tried it. Nog town and egg boyz. Nog nog noggin' on heaven's (ice cream) door... how many bad puns could I come up with for egg nog ice cream?

I realize it's January, we're all on diets (not really!) or at least dead-sick of all of those rich, calorie-laden, seemingly endless piles of holiday shortbreads, chocolates, cakes, pies (it seems we are gluttonous pigs here in many parts of North America)... and exercising off the holiday fat layer is on our minds. No one wants to hear about another caloriexplosion ice cream -- they want to hear about frozen grapes and low-sugar fruit sorbets or nonfat frozen yogurt.

But still. I made this eggnog ice cream and I will tell you about it. Do with it what you will. Ie, wait until next holiday season to churn it up, eat it up and exercise it off only a few weeks later... I admit, it's well past Christmas and I am guilty of spooning the last scoop of it all up in my grill...

Extreme easy alert on this ice cream recipe! File under: super lazy!

{Ridiculously Easy Egg Nog Ice Cream}

You will need:

2 cups of full fat egg nog (from a store-bought carton, no less!)
1 cup half and half (10% milk fat)
1 can sweetened condensed milk
generous pinch of salt

1. Whisk all of your ingredients into a large bowl.
2. Chill mixture covered until good and cold, 1 hour in fridge or power-chilled in freezer for 30 minutes.
3. Pour into ice cream maker and mix according to maker's instructions -- churn away! 20-25 minutes gave me a delightfully frozen, thick and ice-creamy consistency.
4. Marvel at how even a baby or a cat could make this recipe.

Enjoy, and Happy New Year... !

xo Lyndsay

Thursday, December 23, 2010

Pep Pie!


Anyone out there remember Pep? Like an oversized After-Eight saucer, a tongue-cooling white peppermint "candy"-filled dark chocolate party puck in a crinkly, shiny green wrapper.

My husband Rich's favourite ice cream is peppermint chocolate chip, and I have been pretty exhausted with making cakes lately so when I get a chance to make something else I get quite excited! So for Rich's birthday, I made this Pep pie...

Ice cream pie made out of homemade ice cream, and it was truly simple and magical indeed. Crumbs of the Oreo cookie combine with melted butter and get pressed into a pie pan. Baked for just a few minutes until set, then left to cool. Ice cream is churned and piled into the pie pan, smoothed with an offset spatula and left to set in the freezer. A rich dark cocoa fudge topping is made on the stovetop, cooled, and poured on top of the ice cream pie. Back into the freezer it goes to set, uncovered, for an hour. Then plastic wrap covers it until the time comes to slice in.

Thus, I christened this my Pep Pie. I made the creamy cool peppermint ice cream filling using condensed milk, heavy cream, peppermint extract and a pinch of salt, and I just had to use the teensiest bit of green food colouring to trick the eye into thinking "peppermint". Not that you would have to trick yourself... one bite and the peppermint cools your mouth, a creamy smooth spoonful with flecks of dark chocolate folded into it.

To my honeybun Richie: Happy Birthday!!

{Peppermint Ice Cream Pep Pie}

You will need:
An Oreo or chocolate wafer cookie pie crust
peppermint ice cream

dark cocoa chocolate fudge topping
(recipes below!)

to make the crust:

Combine 1 1/4 cups Oreo or dark wafer cookie crumbs with 1/4 cup melted butter. Press into 9 inch pie pan. Bake at 350 degrees for 6-8 minutes until set. Let cool on wire rack.

to make the ice cream:

1. In a medium sized bowl, whisk to combine 3 cups of heavy cream with 1 can of sweetened condensed milk (300 ml)
2. Whisk in 3 teaspoons or pure peppermint extract and 1 generous pinch of salt. Add a teensy touch of green food colouring if so desired.
3. Power-chill mixture in the freezer for 30 minutes until mixture is ice cold but not frozen.
4. Pour into ice cream maker and mix according to ice cream maker instructions, I churned mine for about 25 minutes or so until thick and creamy.
5. Fold in 1 cup of chopped dark chocolate pieces, or chocolate chips of any size.
6. Scoop ice cream into cooled pie shell, using an offset spatula to smooth it. Put in freezer, uncovered while you make the fudge sauce.

to make the fudge sauce:

On stovetop, combine 1/3 cup of dark or high quality cocoa powder with 2/3 cup sugar, 1/3 cup of heavy cream and 3 tablespoons of butter. Whisk gently to combine. Add 1 teaspoon of pure vanilla extract, whisk until smooth. Pour into bowl to cool. I power-chilled my fudge sauce in the freezer for 20 minutes!

Once fudge sauce is cooled, pour on top of peppermint ice cream layer. It's important that the fudge sauce is cooled otherwise it will melty-melt the ice cream and it won't look very pretty.

Place back in freezer and chill for 1 hour uncovered until fudge sauce is set. Then wrap with plastic wrap and chill until time to serve!!

PS you will have leftover ice cream as the recipe above won't all fit into one pie shell! ^_^

You can serve with fresh whipped cream and chocolate shavings or chocolate chips. I meant to do this but I was also hosting a fondue party at the same time so I never got around to making the whipped cream... :)

Wednesday, October 20, 2010

Leftover Pumpkin Pie Ice Cream!


Hello fellow ice cream crazy people! I went to Crazy Town today with an idea. Last week was Canadian Thanksgiving here in good old Vancouver, BC Canada and to celebrate, I made two pies from scratch: pumpkin pie with a ginger snap crust and maple syrup whipped cream, and classic lemon meringue pie with a fluffy toasted meringue. Side note to all pie makers: high fives all around to you guys. Pies can really take some time! But every moment was enjoyable and I look forward to making more and more pies in my baking future.

Because I tend to be a bit of an experimenter in the kitchen, measurements aren't always my strong suit-- I was combining a few different pumpkin pie recipes to make one pie so therefore I wasn't sure how much pie filling to make to fill my 9 inch ginger snap crust. So I went with doubling the pie filling recipe, figuring more is better... thus, I had leftover pie filling! About 3 cups of it, which I poured into a container and put in the fridge.

I'll make another pie with that later, I said.

But then today, I was struck with an idea: why not cook the filling like you would an ice cream custard, add some sweetened consdensed milk and whole milk, mix it up and throw it in ye olde ice cream machine and see what happens??

What happened was a total experiment, and an example of using up ingredients to make something else... no waste! Hooray! But sometimes crazy recipes come into fruition this way, right? This turned out to be a really smooth, creamy and delicious ice cream with a distinct pumpkin/spice/brown sugar flavour.

So here it is. A recipe for pumpkin pie ice cream! I recommend pairing it with some crunchy thin ginger snaps... either ice cream sandwich style or served on the side!

{Pumpkin Pie Ice Cream}

You will need:

3 cups of 1 recipe pumpkin pie filling (recipe right below. make a pie too!)
1 can sweetened condensed milk (300 ml) 1.5 cups heavy cream

(Pumpkin Pie Filling)

1.5 cups heavy cream
2 eggs, beaten

1 16oz can of pumpkin

1/2 cup brown sugar

1 tsp cinnamon

1 tsp powdered ginger


1. Mix all your pumpkin pie filling ingredients together. Put in a medium saucepan on stove. Cook on stove at medium-high for a few minutes until it thickens, stirring constantly. Remove pot from stovetop, let cool.

2. In a large bowl, pour in sweetened condensed milk. Whisk in heavy cream.

3. Slowly whisk in cooled pumpkin pie filling into milk ingredients. Whisk together to combine.

4. Chill pumpkin pie ice cream mixture until well-chilled, 1 hour in freezer or 3-4 hours in refrigerator!

5. Pour into ice cream maker and watch some pumpkin power churn up before your eyes, 25-30 minutes or until desired ice creaminess.

6.
Scoop out and enjoy with a side of ginger snaps, or scoop between two crisp ginger snaps for a very delightful ice cream sandwich!

Happy Fall everyone! ^_^
Related Posts Plugin for WordPress, Blogger...