Monday, August 23, 2010

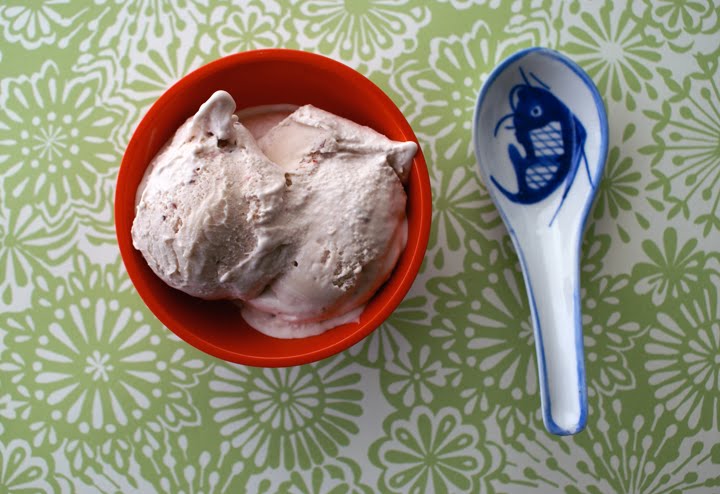
Maple Syrup Ice Cream With Candied Walnuts


I'm a nut for nuts. I'm so happy I'm not allergic to nuts. I think Mr.Peanut is hilarious, I can eat peanut butter with a spoon. And walnuts are the healthy brainfood nut. I also love maple syrup. I've always loved maple flavoured things. Pour it into the little squares of a crisp homemade waffle that's covered in summer berries and plain Greek yogurt and I'm the happiest person on planet Earth.

Back to ice cream: I've decided to start a new project: Ice Cream Love. Makin' my favourite peoples' favourite ice cream flavours! I decided to start with my dear pal Amber, who is nuts for maple walnut ice cream. Whenever I meet someone I like, I can't help but ask them what their favourite food is. I feel like it can help define my relationship to that person, or how well I know them. For instance, I know my husband's favourite ice cream is mint chocolate chip, and he likes anything chocolate hazelnut, and he dislikes very much mushrooms, tomatoes and mustard (three things I love!). Amber's favourite ice cream is maple walnut. My friend Toni loves the combination of chocolate orange just as much as my friend Heather despises it.

Me, I try to like or at least attempt to like all flavours, or, rather, understand why other people like them. I like most things actually. One flavour I think that is super grody to the max though is black licorice. Even so, I will still occasionally try it (the allure of the shiny black salted licorice studded with tiny candies) to make sure I still don't like it. Who knows? Maybe my palette suddenly has changed and I've become a black licorice maniac!

My favourite flavours actually shift fairly often. I love lemon and citrus flavoured things, but I also love a beautiful piece of chocolate. I've always loved caramel in any way shape or form -- poured as a thick sweet syrup on top of ice cream, or eaten in individually wrapped squares in between bites of a granny smith apple. Maple syrup of course, and green tea flavour too, both thumbs up in my book. All these flavours are pretty varying and no rhyme or reason! Such is the strangeness of humanity!

Okay. So onto the recipe. I figured those walnuts had to have something goin' on besides just being thrown in all plainsies style. Pralined? Candied? Sugared? I flipped through The Perfect Scoop and saw a recipe for "Crouquant." Essentially, nut brittle. So I decided to make that! (Only after I made the croquant did I look at a few recipes for maple walnut ice cream and it called for walnuts that had been bathed, per se, in maple syrup at a high temperature, which I will try next time.)

{Maple Syrup Ice Cream With Candied Walnuts}

You will need:


1 1/2 cups walnuts
1 cup sugar
2 cups heavy cream
1 cup whole milk (10% milk fat)

3/4 cup maple syrup
1 teaspooon pure vanilla extract

pinch of salt

1. Preheat oven to 350 degrees. On baking sheet, lay a piece of parchment paper and sprinkle walnuts evenly. Toast walnuts in oven, 6-8 minutes, watching carefully so they don't burn.
2. Remove walnuts, let cool.
3. Place 1 cup of sugar in a heavy bottomed pan. Heat on medium high until golden, beginning to bubble and liquefying. Stir gently to ensure all sugar melts and liquifies!
5. Once liquified, add in toasted walnuts into melted sugar and coat walnuts completely. Mix 'er up. Pour mixture back onto same piece of parchment paper, spread out with spatula and let cool.
6. Once cool, place in food processor and pulse until pieces become smaller, or you can place brittle in a ziploc bag and beat it with a rolling pin...
7. In medium sized pot, heat 1 cup of heavy cream and maple syrup on low until combined. Add the rest of the heavy cream, milk, vanilla and salt and mix until combined.
8. Cover and chill mixture, 1 hour in freezer or 3-4 hours in fridge.
9. Pour into ice cream maker and churn it up according to ice cream maker's instructions. I churned it for 25 minutes. At the last minute, pour in candied walnut pieces and churn for 30 seconds or so until combined.
10. Scoop out and enjoy!

PS-- there are no eggs in this recipe -- but the sugar content from the maple syrup ensures a creamy dreamy delight! No jacket required! (er, no eggs required)...

Sunday, August 8, 2010

Vietnamese Iced Coffee Ice Cream

Yep.

I am a coffee ice cream maniac. I think it all started with my mom's famous ice cream mud pie. My mom has made this since we were kids, and it's the one dessert all of my cousins and my sisters clamour for at Christmastime - even when there's a buffet of rich cakes and pastries and candies - it's the mud pie that gets the attention, our forks and spoons ready to tuck into the dark chocolate crust, creamy coffee ice cream middle and chocolate fudge topping.

Our family is also a mega huge fan of the Cambodian/Vietnamese restaurant here in Vancouver called Phomn Penh, or PP as we call it (if you're not from Vancouver and happen to be visiting, it is an essential food stop!). We've been going there for well over 20-odd years (probably more) and it is here where I got my first initial taste of Vietnamese iced coffee.

A little silver thingie went on top of a glass cup with some sweet creamy stuff on the bottom. Dark brown hot stuff drip-drip-dripped out the bottom, splashing onto the creamy stuff. Once it finished dripping, everything got all mixed together with ice and it was like a liquid power dessert that zinged like a coffee rocket through your veins upon first sip.

On a recent trip to T&T Supermarket with my dad, I finally bought my own "silver thingie" -- in fact, a Vietnamese coffee press. Slowly over a crazy busy week I procured all of my ingredients to make the iced coffee: sweetened condensed milk, and today French dark roast medium-coarse ground coffee! (I bought the beans at a local coffee shop and had them ground). And now... I am so buzzed on this strong coffee. Here is a great tutorial on how to make it. After I made a glass of iced coffee for myself, it was time to move on to the main project: Vietnamese Iced Coffee Ice Cream.

This is the easiest ice cream ever and it tastes crazy-delicious creamy. It maintains an excellent texture straight out of the freezer, no setting out at room temp to warm up a bit! Next time I am going to try playing around with the amount of sweetened condensed milk as I like my ice creams not-too-sweet, but I wonder if it would mess with the perfect consistency, as there are no eggs in this recipe, thus the condensed milk gives it its thick creaminess...

{Vietnamese Iced Coffee Ice Cream}


adapted from David Leibovitz's recipe in the very excellent ice cream book
"The Perfect Scoop".


You will need:


1 can of sweetened condensed milk
1 1/2 cups of French dark roast coffee, brewed strong!

1/2 cup heavy cream
a pinch of the dark roast coffee


1. Brew a very strong batch of espresso using French dark roast coffee.
2. Place sweetened condensed milk in medium bowl.
3. Whisk brewed coffee, heavy cream, pinch of dark roast coffee and sweetened condensed milk all together until combined.
4. Cover and set in refrigerator until well chilled, 3-4 hours. Or try power-chilling it in the freezer but watch carefully!
5. Pour into ice cream maker and churn it up according to maker's instructions. I churned it up for about 25 minutes.

Enjoy this simple and delicious recipe! And maybe use the buzz you get from it to power-clean your house or write a novel!

xo

Tuesday, July 27, 2010

Local Blueberries Ice Cream!


Summer breeze... makes me feel fine... blowing through the jasmine of my minddddd... Ok. I had no idea that was the next line in the song. I had to google it. Man I've had a terrific summer so far. My baking premises got a beautiful kitchen makeover, I went to 5 lovely weddings, including an incredible one in the Bavarian countryside in Germany, traveling with two great friends. Now I'm back and makin' some ice cream on a day off. Not too shabby, I must say! I am a lucky gal!

Anyhoo... blueberries!! So many bright blue delightful little berries in our province of British Columbia right now! You can u-pick them, or people sell them on the side of the road in boxes along with fresh cherries or ears of sweet local corn, and the grocery stores are chock full of them... !

I dunno why but I always think blueberry ice cream or blueberry yogurt tastes like blueberry cheesecake. Perhaps that's why blueberry cheesecake is such a popular combination. This ice cream is no different -- mental blueberry mindgames?

{Blueberry Ice Cream}

You will need:

6 cups fresh blueberries (why not go local if you can!) to make 1.5 cups of puree.
1 tablespoon of freshly squeezed lemon juice
food processor or blender
3/4 cup white granulated sugar

1.5 cups half and half cream
1.5 cups heavy cream

3 egg yolks
fine mesh strainer, and ice cream machine!


1. You will need to make a blueberry puree. Blend the 6 cups of blueberries in the food processor or blender! Using a strainer on top of a bowl, pour blended blueberry mixture into the strainer and, well, strain the mixture using a spatula to push the puree through. Whisk in the lemon juice to prevent browning. Set aside.

2. In a medium saucepan on low heat, combine the half and half cream (10% milk fat) with the sugar.

3. In a medium bowl, whisk egg yolks. In another bowl, pour in heavy cream and add a fine mesh strainer to the top.

4. Slowly, while whisking, pour sugar milk into egg yolks and whisk it all together. Pour back into saucepan and turn up the heat - medium to high heat. Stir constantly until the mixture thickens and coats the back of a spoon. Watch carefully about 3-5 minutes!

6. Remove custard mixture from stove.

7. In the bowl with the heavy cream, slowly pour in the hot custard mixture through the strainer into the heavy cream, mix until combined.

7. Slowly pour in the strained blueberry puree (there should be 1.5 cups!) and

8. Whisk until combined.

9. Cover bowl with plastic wrap, place in freezer for 1 hour roughtly until chilled, or 2-3 hours in refrigerator.

10. Pour into ice cream maker and make according to machine's instructions! (20 minutes or so until thickened!)

11. Enjoy your blueberry ice cream!

Wednesday, June 16, 2010

Raspberry (& Strawberry) Beret: Macaron Ice Cream Sandwiches

The kind you find in a second hand store! Man, who doesn't love Prince? Prince is a serious genius. He lives in a purple mansion, for goodness sake. And he wrote Nothing Compares 2 U, which is one of the best songs perhaps ever.

Anyhoo, check out these nutty (ahem) little French almond macaron raspberry strawberry ice cream sandwiches I made! I followed the handy dandy Martha Stewart Baking Handbook version of these macaron and I think they turned out pretty good. Crunchy crispy chewy, and sandwiched in between is a homemade raspberry/strawberry ice cream.

I got the idea for the swirly-piped macaron ice cream sandwich from two places:

One, Jeni's Splendid Ice Creams, which exists very far away from Vancouver BC Canada where I live, in the state of Ohio, USA. Of course I've only ever seen pictures of her ice creams but she is one of my ice cream heroes. Two, I recently went on a fun trip to Los Angeles... you can read about my food adventures HERE... and had the most delightful macaron ice cream sandwich!! So... of course I had to try making some for myself!

These turned out lovely -- great texture and crunchy chewiness of the macaron, and the ice cream in the middle produced a really lovely double berry flavour! I was worried the strawberries might get overpowered by the raspberries but when I tasted the ice cream, I got strawberry first then raspberry... like a Willy Wonka meal-in-a-gumball! :)


Raspberry Strawberry Macaron
Ice Cream Sandwiches


Organic strawberries!

Piped out macaron discs, baked!

Do you know this lady, this crazy lady named Martha?

Crispy on the outside, chewy on the inside. The French almond macaron.

You're doing a few things at once here: makin' ice cream and makin' macaron! And you're doin' it all with a Chinese soup spoon!

But it's worth it, all your hard work! Macaron ice cream burger!!

Crunch and munch. The photographer is also the food tester, as well as the food-maker.

Pretty in (slightly coral peachy) pink!

Mini ice cream macaron sandwich.


Okay, enough photo harassment. Here's the recipe! Enjoy, let me know how it goes!! Excited to try many many combinations of these in the future too... :)

///////////////////////////////////////////////////////

{Raspberry Strawberry Ice Cream Macaron Sandwiches}

You will need:

1 recipe for French almond macaron, found HERE
1.5 cups strawberries, sliced (I used organic strawberries)
teensy bit of lemon zest
wedge of lemon

1/2 cup raspberry jam
(you could also use real raspberries here!)
1/2 cup white granulated sugar

1.5 cups half and half cream
1.5 cups heavy cream

3 egg yolks
fine mesh strainer, and ice cream machine!


1. In a medium saucepan on low heat, combine the strawberries, jam, lemon juice from wedge of lemon and zest. Stir until bubbling. Remove from heat.

2.In a medium bowl, whisk egg yolks. In another bowl, pour in heavy cream.

3. In a medium saucepan on low heat, combine half & half with the sugar and stir until sugar is melted and combined.

4. Slowly, while whisking, pour sugar milk into egg yolks and whisk it all together. Pour back into saucepan and turn up the heat - medium to high heat. Stir constantly until the mixture thickens and coats the back of a spoon. Watch carefully about 3-5 minutes!

5. Remove custard mixture from stove.

6. In the bowl with the heavy cream, slowly whisk in the hot custard mixture until combined.

7. Place strainer on top of same bowl. Pour in strawberry/raspberry jam mixture, reserving the strawberries in the strainer to be used later!

8. Whisk until combined.

9. Cover bowl with plastic wrap, place in freezer for 30 minutes until chilled, or 2-3 hours in refrigerator.

10. Pour into ice cream maker and make according to machine's instructions! (20 minutes or so!)

11. Fold in the strawberries left from straining! Freeze for 20 minutes before assembling macaron ice cream sandwiches to firm up the ice cream!

12. Scoop some ice cream into the center of one macaron. Top with another macaron of the same size. Squish down a little, and enjoy!! Can be kept in the freezer in an airtight container for up to 1 week.

Tuesday, April 27, 2010

Pistachio Ice Cream


I've had a lovely bag of pistachios burning a hole in my cupboard for much too long. Sorry I've been missing in action in Ice Cream Land-- Cupcake Land has taken over my entire LIFE! Finally a day off and instead of lying around in bed... I got up for some Spring cleaning, which led me to open the cupboard and see my pal Pistachio Bag.

Must. Make. Ice Cream. I modified this ice cream between my David Leibovitz "Perfect Scoop" classic recipes and one I found on the Food Network made by Emeril Lagasse! The flavour is a nice combination of vanilla, almond extract and bits of pistachio... the lightest of green in color as well... Enjoy! :)

{Pistachio Ice Cream}

You will need:

3 cups heavy cream


3 egg yolks

1 cup shelled pistachios


3/4 white granulated sugar

1/2 tsp pure almond extract


1/2 tsp pure vanilla extract


1. Blend half the sugar with the pistachios in a food processor until fine. Careful not to make pistachio butter.

2. Bring 2 cups heavy cream and the other half of the sugar to a low boil in a medium saucepan.

3. Slowly whisk in the heavy cream into the egg yolks.

4. Place back on stovetop, stir occasionally until custard coats the back of a wooden spoon (about 6 minutes on medium heat)

5. Slowly pour custard mixture into remaining 1 cup of heavy cream in medium bowl.

6. Mix in almond extract and vanilla extract, and pistachio/sugar combo.

7. Cover mixture with plastic wrap and chill for 60 minutes in freezer. Watch that it doesn't freeze mixture though!

8. Pour into ice cream maker and watch the pistachio nut magic unfold!!

Sunday, March 21, 2010

Pink Raspberry Rose Cream


Another Sunday ice cream experiment. Only this time... Last night I had stayed up til 3am dancing away at my friend Toni's birthday party. I had on a lovely purple vintage silk top that I bought in Portland on a recent trip, and let's just say by the end of the night it looked like I had been working out at the gym on hyperspeed. Sopped in sweat, I hung my silk top to dry at 330am with hopes that it wouldn't be horribly stained the next day!!

Yes, I danced for four hours straight. A rarer and rarer occurrence for a lady in her 30s, sadly! But it was super fun. Today I feel like I ran a marathon (ie, dance hangover) but it just felt like an ice cream making day. I decided to wing it with a made-up recipe for Pink Raspberry Rose Cream. It seems you just can't go too too wrong when experimenting with homemade ice cream. Unlike baking, you can really throw lots of stuff in there in varying amounts and still, the result is usually frozen goodness!

This turned out soooo creamy and yummy, with a pure raspberry flavour, pale pink in color with the tiniest hint of heavenly rose. The flavour gave me a nostalgic throwback to a raspberry mousse dessert my mom used to make in the 1980s. She would serve it in these special "mousse" crystal goblets which I thought were the fanciest things in the world... I think this mousse was made up of raspberry Jell-o and melted vanilla ice cream? I'll have to ask my mom!!

As usual, I turned down the amount of egg yolks (most recipes usually call for 5) and it still turned out great. :)

{Pink Raspberry Rose Cream}

You will need:

1.5 to 2 cups raspberries (I used frozen)
3/4 cup white granulated sugar
3 cups heavy cream (you can substitute lesser-fat milk here if you wish!)
2 egg yolks
1/8 teaspoon
(or to taste) of pure rosewater extract
fine mesh strainer, and ice cream machine!

1. In a medium saucepan on low heat, combine the raspberries and the sugar into a coulis of sorts. Set aside.

2.In a medium bowl, whisk egg yolks and 1 cup heavy cream. In a medium saucepan on medium to high heat, pour in egg yolk mixture and stir constantly until the mixture thickens and coats the back of a spoon. Watch carefully!

3. Remove custard mixture from stove.

4. Pour other 2 cups of cream into the same medium bowl. Slowly whisk in the hot custard mixture until combined.

5. Place strainer on top of same bowl. Pour in raspberry coulis mixture, using a spatula to mash all the precious raspberry juice into the cream mixture, leaving behind the seeds in the strainer.

6. Whisk until combined.

7. Add 1/8 teaspoon (or to taste) of pure rosewater extract. Careful, this stuff is STRONG! Whisk until combined.

8. Cover bowl with plastic wrap, place in freezer for 30 minutes until chilled, or 2-3 hours in refrigerator.

9. Pour into ice cream maker and make according to machine's instructions! (20 minutes or so!)

Enjoy!

till next time,

xo Lyndsay

Monday, March 15, 2010

Vanilla Bean Coconut Ice Cream


The cool thing (heh) about this ice cream: easy breezy to make. Like a cool breeze on a hot day. Except, if you accidentally leave the mixture in the freezer for three hours when you only meant to chill it briefly. This is what happened to my vanilla bean coconut ice cream--so I mashed it all up with forks into a slushy mixture and I still tried to put it in my ice cream machine in vain. My poor Silver Ice Cream Machine chugged along, pretty much screaming in overloaded pain, so I had to quit. The mix had already formed ice crystals, and never recovered... but of course I'm still eating it anyway.

But since I've made this recipe before, I can tell you this is a creamy and delightful ice cream for the coconut megafan, fragrant too from the vanilla bean. So I'm sharing it anyway even though this particular batch did not work out for me because I forgot about my chilling mixture! This recipe is also great for vegans or those allergic to dairy, as it is completely dairy-free! It's quite rich and is nice served with fruit, as the acidity of the fruit is a nice contrast to the creamy richness of the coconut cream.

{ Vanilla Bean Coconut Ice Cream }

You will need:

1 can of nice quality coconut milk (it's best not to cheap out on coconut milk. Usually, unless it's on sale, the costlier the can, the more fat it will have in it, thus a creamier coconut milk and creamier ice cream).
2 cans of nice quality coconut cream
1/2 cup white granulated sugar (I like my ice creams less sweet- most recipes call for at least 3/4 cup, so use your own discretion!)
1 vanilla bean, split
1 teaspoon pure vanilla extract
pinch of salt

1. In a medium saucepan over low to medium heat, combine coconut milk, sugar, vanilla bean innards, vanilla, salt and vanilla bean pod. Stir until sugar has dissolved. Remove from heat, cool slightly.

2. In medium bowl, whisk all of the coconut cream together until combined. (Sometimes coconut cream and coconut milk separates in its cans but just whisk back together and no prob.)

3. Slowly whisk in cooled coconut milk/sugar mixture into coconut cream mixture until combined.

4. Chill mixture, wrapped with plastic wrap, in freezer for 30 minutes, or in fridge for 2-3 hours until well chilled.

5. Pour cold mixture into ice cream machine, and make according to machine's instructions!

No need to serve with chopsticks... :)

Enjoy! Yay!
Related Posts Plugin for WordPress, Blogger...