Sunday, March 21, 2010

Pink Raspberry Rose Cream


Another Sunday ice cream experiment. Only this time... Last night I had stayed up til 3am dancing away at my friend Toni's birthday party. I had on a lovely purple vintage silk top that I bought in Portland on a recent trip, and let's just say by the end of the night it looked like I had been working out at the gym on hyperspeed. Sopped in sweat, I hung my silk top to dry at 330am with hopes that it wouldn't be horribly stained the next day!!

Yes, I danced for four hours straight. A rarer and rarer occurrence for a lady in her 30s, sadly! But it was super fun. Today I feel like I ran a marathon (ie, dance hangover) but it just felt like an ice cream making day. I decided to wing it with a made-up recipe for Pink Raspberry Rose Cream. It seems you just can't go too too wrong when experimenting with homemade ice cream. Unlike baking, you can really throw lots of stuff in there in varying amounts and still, the result is usually frozen goodness!

This turned out soooo creamy and yummy, with a pure raspberry flavour, pale pink in color with the tiniest hint of heavenly rose. The flavour gave me a nostalgic throwback to a raspberry mousse dessert my mom used to make in the 1980s. She would serve it in these special "mousse" crystal goblets which I thought were the fanciest things in the world... I think this mousse was made up of raspberry Jell-o and melted vanilla ice cream? I'll have to ask my mom!!

As usual, I turned down the amount of egg yolks (most recipes usually call for 5) and it still turned out great. :)

{Pink Raspberry Rose Cream}

You will need:

1.5 to 2 cups raspberries (I used frozen)
3/4 cup white granulated sugar
3 cups heavy cream (you can substitute lesser-fat milk here if you wish!)
2 egg yolks
1/8 teaspoon
(or to taste) of pure rosewater extract
fine mesh strainer, and ice cream machine!

1. In a medium saucepan on low heat, combine the raspberries and the sugar into a coulis of sorts. Set aside.

2.In a medium bowl, whisk egg yolks and 1 cup heavy cream. In a medium saucepan on medium to high heat, pour in egg yolk mixture and stir constantly until the mixture thickens and coats the back of a spoon. Watch carefully!

3. Remove custard mixture from stove.

4. Pour other 2 cups of cream into the same medium bowl. Slowly whisk in the hot custard mixture until combined.

5. Place strainer on top of same bowl. Pour in raspberry coulis mixture, using a spatula to mash all the precious raspberry juice into the cream mixture, leaving behind the seeds in the strainer.

6. Whisk until combined.

7. Add 1/8 teaspoon (or to taste) of pure rosewater extract. Careful, this stuff is STRONG! Whisk until combined.

8. Cover bowl with plastic wrap, place in freezer for 30 minutes until chilled, or 2-3 hours in refrigerator.

9. Pour into ice cream maker and make according to machine's instructions! (20 minutes or so!)

Enjoy!

till next time,

xo Lyndsay

Monday, March 15, 2010

Vanilla Bean Coconut Ice Cream


The cool thing (heh) about this ice cream: easy breezy to make. Like a cool breeze on a hot day. Except, if you accidentally leave the mixture in the freezer for three hours when you only meant to chill it briefly. This is what happened to my vanilla bean coconut ice cream--so I mashed it all up with forks into a slushy mixture and I still tried to put it in my ice cream machine in vain. My poor Silver Ice Cream Machine chugged along, pretty much screaming in overloaded pain, so I had to quit. The mix had already formed ice crystals, and never recovered... but of course I'm still eating it anyway.

But since I've made this recipe before, I can tell you this is a creamy and delightful ice cream for the coconut megafan, fragrant too from the vanilla bean. So I'm sharing it anyway even though this particular batch did not work out for me because I forgot about my chilling mixture! This recipe is also great for vegans or those allergic to dairy, as it is completely dairy-free! It's quite rich and is nice served with fruit, as the acidity of the fruit is a nice contrast to the creamy richness of the coconut cream.

{ Vanilla Bean Coconut Ice Cream }

You will need:

1 can of nice quality coconut milk (it's best not to cheap out on coconut milk. Usually, unless it's on sale, the costlier the can, the more fat it will have in it, thus a creamier coconut milk and creamier ice cream).
2 cans of nice quality coconut cream
1/2 cup white granulated sugar (I like my ice creams less sweet- most recipes call for at least 3/4 cup, so use your own discretion!)
1 vanilla bean, split
1 teaspoon pure vanilla extract
pinch of salt

1. In a medium saucepan over low to medium heat, combine coconut milk, sugar, vanilla bean innards, vanilla, salt and vanilla bean pod. Stir until sugar has dissolved. Remove from heat, cool slightly.

2. In medium bowl, whisk all of the coconut cream together until combined. (Sometimes coconut cream and coconut milk separates in its cans but just whisk back together and no prob.)

3. Slowly whisk in cooled coconut milk/sugar mixture into coconut cream mixture until combined.

4. Chill mixture, wrapped with plastic wrap, in freezer for 30 minutes, or in fridge for 2-3 hours until well chilled.

5. Pour cold mixture into ice cream machine, and make according to machine's instructions!

No need to serve with chopsticks... :)

Enjoy! Yay!

Sunday, March 7, 2010

Green Tea Frozen Yogurt


Green tea frozen yogurt! Hooray! I would say this isn't the healthiest frozen yogurt ever. It's no Pinkberry unfortunately (ie, super low-calorie). But I really wanted to try out the Greek-style yogurt in a frozen yogurt recipe. Next time I'll make a lower fat version... or not... heh.

I just kind of made this up based on previous ice cream recipes but it turned out pretty delightfully! The texture is more on the ice-milky side rather than the creamy ice creamy-ness side, I think it's due to the lack of the cooked eggs/custard part. But it's bright and yogurty and refreshing and tart. You can play around with the amount of sugar in it too and see what happens.

Isn't that the cutest heart-shaped ice cream spoon? My mom gave my hubby Rich and I matching "Alessi" ice cream bowls for Christmas two years ago and they came with these perfect spoons... (my mom knows me well, eh?) I'll snap pics of the ice cream bowls in the near future no doubt, with future ice cream experiments inside. Er, you can also see my reflection snapping a pic in the spoon... heehee.

Let me know if you make this, and how it goes for you!

{ Matcha Green Tea Frozen Yogurt }


You will need:

1 tablespoon matcha green tea superfine powder
1 cup light cream (10& butterfat milk)
1/2 cup white granulated sugar

2 cups Greek style 10% fat plain yogurt

1 cup of milk

tiny pinch of salt


1. In a liquid measuring cup, whisk the green tea powder into the 1 cup of light cream until well combined.

2. In a medium sized bowl, whisk the green tea milk, sugar, plain yogurt, milk and salt until well combined.

3. Chill in freezer, covered with plastic wrap, for 30 minutes until well chilled, or in the fridge for 2 hours.

4. Pour into ice cream machine and make according to machine's instructions.

Enjoy!! :)

Thursday, March 4, 2010

Cereal Milk Ice Cream: Frosted Flakes Sundae


I think the first time I had cornflakes on my ice cream was in Japan in 2002. On that trip, any time I saw green tea "soft cream" (soft serve ice cream) I would get it. And it happened to be everywhere! I knew I would never have it this good for a long, long time (being the soft serve fanatic and a green tea ice cream maniac that I am). So, like, every day I would get a green tea soft cream cone.

In Japan I also had my first Asian-y sundae. The light and corny crunch of corn flakes or frosted flakes on ice cream is unbeatable. Add some mochi, some sweet red bean and you have an Asian sundae straight from the doors of Ice Cream Heaven.

Speaking of travel: It's been four years since my last visit to New York and I am dying to go back, to eat my way through the streets and to try all the places I've been reading about over the last few years... Momofuku for one! Momofuku Milk Bar has the best-sounding crazy person menu, and one of their feature items is their trademarked Cereal Milk ice cream! Yes!! I love cereal so hard--I can't even buy cereal because I will vaporize it in like two days. That's how much I love cereal.

Cereal milk ice cream, eh? I have fond memories of eating cereal as a kid. When we were kids, we rarely got the special cereals, ie the ones with loads of sugar. When we would go down to Seattle on special occasions, we could get to bring back the crazy "American" cereals-- Count Chocula, Fruity Pebbles, Cinnamon Toast Crunch... but in Burnaby, BC, it was Red River cereal on the stovetop for us! And sometimes Honey Nut Corn Flakes, or "Just Right." But the sugary ones were the ones to turn your milk pink, or chocolatey, leaving their sugar behind ready to be spooned up or drunk back with a tip of the bowl.

So back to the ice cream recipe. A few googles later, I found this blog and her take on the Momofuku cereal milk ice cream. A few modifications later and here it is, with the addition of Frosted Flakes sprinkled on top, it's a perfect little crunchy and creamy sundae.

{CEREAL MILK ICE CREAM with FROSTED FLAKES}

You will need:

1 cup heavy cream 2 cups whole milk 2.5 c FROSTED FLAKES 3 egg yolks 1/4 c sugar (or less... I used slightly less than this). Ice cream maker!

1. In a medium bowl, combine cream and milk with Frosted Flakes. Refrigerate for up to 30 minutes.

2. Strain cereal out and discard. Put mixture in saucepan with sugar (to taste) and bring to a simmer on Medium Low heat. Meanwhile, whisk egg yolks in another bowl.

3. Once sugar is melted into milk, remove from heat. Slowly whisk milk mixture into egg yolk mixture until combined. Be careful not to scramble your egg yolks with this step!

4. Place saucepan back on burner on medium-high heat, add mixture. Continuously stir until the mixture thickens and coats the back of a spoon. Watch carefully!

5. Remove from heat, pour into bowl, cover with plastic wrap so the wrap touches the surface of the mix so no milky skin thing forms, and place in freezer for 2 hours, or refrigerate overnight. Mix must be cold before hitting the ice cream maker.

6. Place in ice cream maker and make according to machine's instructions. I mixed for about 22 minutes, it seemed about right... !

You can now eat this deliciousness right away or pack it into an airtight container, such as a yogurt container, to harden up. When you want to eat it, place on counter for 5-10 minutes to soften it up before scooping.

Scoop into a cute bowl, sprinkle generously with more Frosted Flakes, and enjoy a TRUE DELIGHT!!!

'til next time Ice Cream Land,

xo Lyndsay

Saturday, February 27, 2010

Milky Tea Earl Grey Ice Cream!


Doo doo doo... Saturday morning... la la la... husband's already up early, working on a project... I rolllll out of bed... think about going for a run... haven't put contacts in yet so a little blind.

Hmm. Ice cream. 830am.

Okay!!!

Yes, I started making this ice cream in my pyjamas. It's a little bit time-consuming but worth it, like most things, don't you agree? I just love milky tea flavoured things. Tea things in general. Bubble tea? Love it. Tea flavoured cakes? Love. I start every morning off with a heavily-steeped bag of tea with soymilk. Perfect. Pumps me up. Today felt like the right morning to make Earl Grey Ice Cream... I call it Milky Tea Earl Grey...

This is a modified version of the Black Currant tea ice cream from The Perfect Scoop...! My beef with the recipes in The Perf Scoop is that they are just a little too sweet for me, and also too eggy... so I decided to experiment with the proportions to see what would happen. Turns out... DELICIOUS DELIGHTS happen!!! Perf Scoop calls for 5 egg yolks and 3/4 cup sugar. I used much less... see below!

{ Milky Tea Earl Grey Ice Cream! }

You will need:


3 cups 10% fat milk (called Half & Half in Canada)
1/2 cup white granulated sugar
2 egg yolks
10 earl grey tea bags (I used "Twinings" brand)
Ice cream maker. I have a Cuisinart silver box-type one. I forget the model name...

1. In a medium saucepan, heat 2 cups of the milk with the sugar and the 10 tea bags on medium heat, until low boil. Once lightly boiling (6-8 minutes or so... keep an eye on it!), remove from heat, stir it up and let sit and cool for 30 minutes.

2. Whisk egg yolks in medium bowl.

3. Check on milky tea mixture: squeeeeeze out the tea-ness from the teabags (be careful not to break bags!) and mix up the cooled milk. Discard tea bags.

4. Slowly whisk in the milky mix into the egg yolks.

5. Return this mixture to the medium saucepan and cook until thickened. Have you ever made a custard or cream pie filling, and suddenly you can feel the mixture thicken, and then you see it? You want to stir with a spatula the mixture on medium-high until it begins to thicken.

6. Whisk this into a medium bowl that has that last cup of milk that's hanging around.

7. Chill in refrigerator until cold, 1-2 hours. Go for a run at this point, or exercise! Then you won't feel bad about scarfing the ice cream when it's ready!!

8. Once mixture is cold, pour into ice cream maker and make according to ice cream maker's instructions. I set my timer for 20 minutes, checking on it every so often. It went for about 25-30 minutes and became wonderfully creamy.

9. Immediately remove from ice cream maker and into a yogurt container or airtight container. Freeze for a few hours to firm, or eat right away! Woohoo!

This ice cream is so milky tea yummy and fragrant with bergamot and lavender... you can make this recipe with any teabags- chai tea, orange pekoe... etc! May as well experiment with whatever you have kicking around. Also, because I used Half & Half instead of cream, and 2 egg yolks instead of 5, it's lighter, lower in fat and less eggy than the regular recipe, yet still tastes perfectly creamy.

Enjoy!!

xo Lyndsay

Thursday, February 18, 2010

Vintage Ice Cream Advertisements

Raspberry, vanilla and orange-pineapple-- that is a bit bonkers, isn't it! Sounds delightful to me. Especially if it comes with some creepy "take me to your dealer" alien acid trip bunnies that are made from cut-out dyed pink slices of bread.

Simple, effective... baseball... orange... two cool stuck together party pops blasting reverse out of that paper Popsicle bag... my fave flavour when I was a kid was root beer popsicle. Or grape.

Keep those scoops coming, Sealtest! I could really tuck into that layered-with-strawberries parfait. And that blue milk-glass scalloped plate is cute too.

Food styling never looked so good! This could be sold at Aberdeen Mall in Richmond, BC at the fake food store. Too bad the fake food is like $200 for a plate of tempura.

The "striated skin flap" style of ice cream layering in this dish of chocolate Meadow Gold ice cream is slightly disturbing. Still, I would spoon into this, like, majorly hard.


{Aren't these the cutest and coolest ads? From Flickr user Christian. These will inspire me to create my next ice creams. }

Ice cream by Coco Cake flavours on deck, stay tuned:

Milky black tea ice cream
Earl grey ice cream
Thai iced tea ice cream
Matcha green tea frozen yogurt
Cereal milk ice cream with Frosted Flakes! (as inspired by Momofuku Milk Bar)

See you soon! xo Lyndsay

Friday, February 5, 2010

Mexican Flavours Inspired Ice Cream Sundae!


We have the loveliest neighbors... we love our friends who live in the suites in our home, and our next door neighbors are just about the best you could ask for. Over the past few years we rock some serious food get-togethers-- Indian Food night (everyone makes everything from scratch!) and on more than one occasion, Mexican Food night!! We all love Mexican food and it's hard to find really good Mexican food in Vancouver, BC. Beautiful, fresh and abundant sushi, yes... amazing Chinese food, yes... but there aren't too many Mexican spots here... so we make our own...

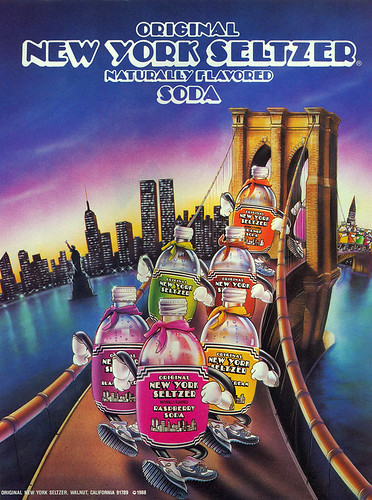
For this particular evening, I wanted to use this Mexican pure vanilla extract which my friend Tara brought back from me on her recent trip to Mexico. It was fun experimenting with something other than my usual Madagascar pure vanilla extract... but to be honest I couldn't really discern a major flavour difference. In fact, I thought the Mexican vanilla extract smelled a bit like one of my childhood smell memories: New York seltzer vanilla soda.

ANYHOO... I made a Mexican Inspired Ice Cream Sundae, with Mexican Vanilla Extract and Madagascar Vanilla Bean ice cream, cinnamon chocolate fudge sauce and toasted almonds!

I followed the Philadelphia-style (no eggs) vanilla ice cream recipe in my book The Perfect Scoop, but used less sugar than called for. It still turns out quite sweet, even with less sugar! I also added two teaspoons of vanilla extract instead of the 3/4 teaspoon requirement... ! This may have contributed to the final ice cream ice-milky consistency... or was it that I substituted heavy cream for 10% milk fat cream? Heehee! I'm not afraid to experiment with a recipe... this is why I have churned out water muffins before (heh).

{For the Mexican fudge sauce}, I modified a recipe to create this:

3/4 cup heavy whipping cream
1/2 cup (or more) freshly brewed strong coffee
16 ounces semisweet chocolate chips (roughly 2 cups! I know it's not really weight-equivalent but it works in a pinch).
2 teaspoons ground cinnamon
1 teaspoon vanilla extract

How to:
Bring cream and 1/2 cup coffee to boil on medium heat, in a medium saucepan. Remove from heat. Add chocolate and cinnamon. Stir gently and slowly until chocolate is melted and sauce is smooth. Mix in vanilla extract.

For the almonds, you can buy dry roasted almonds and chop them up, or you can toast your own by buying raw almonds, laying them out on a cookie sheet and baking them for 10 minutes at 350 degrees. Let cool and they will crisp up, then chop.

This is a very rich sundae so I made small but just-enough portions in small drinking glasses... a perfect ending!

EASY ZONE: You can also just buy a good quality vanilla bean ice cream (I like Haagen Dasz Five), make the sauce (it's fast and easy!) and top with store-bought toasted almonds too...! You could also lightly dust the sundae with a pinch of cinnamon too..

Related Posts Plugin for WordPress, Blogger...